Painting from Home

Hello everyone, 

I'm still waiting to hear from a few of you about your final projects. I understand the situation and will certainly accommodate students struggling during this period. If you haven't sent me your plans for the final project please do so as soon as possible. 

If you're struggling with choosing artists. I'd like to suggest a few artists who work primarily with still lifes and interiors. Something all of us are seeing a lot of right now. If you’ve already sent me your final project proposal, then you’re good to go! However, I”m suggesting these artists to help those still looking for artists who can fit into their lives at this moment in time.

Hillary Pecis

https://www.instagram.com/hilary_pecis/ 

Pecis4.jpg
nicolas uribe.jpg

Nicolas also has an amazine YouTube Series

Lennart Anderson

Lennart_Anderson_sp_hammer_nails_86.jpg

Jermy Miranda

https://www.instagram.com/jeremy_miranda_/

large.jpg

Of course we’re all Edward Hopper paintings now

hopper interior.jpg

Giorgio Morandi

2015_CKS_11005_0111_000(giorgio_morandi_natura_morta).jpg

So what do all of these painters have in common? They all worked from home. Now, in a time where a lot of are working from home due to quarantine and the coronavirus, I think these serve as good examples of painters who took the simplest, and seemingly most commonplace aspects of their lives and turned them into art. Let’s use this time to focus on what is right in front of us. Paint your room, paint the state of transition, or come up with a project that fits exactly where you’re at right now. As I said previously, I understand that many are still getting their footing, but lets push through this final project and make some documentation of where we’re at now.

Of course, if you’re working on your final major project already. Great! This email is meant for those looking for inspiration and guidance as to how to complete the semester and the final project. As always, please feel to contact me with any questions that you may have.

Final Major Project


Hello Everyone,

What a crazy couple of weeks. I hope that you have found some sort of stability and that things have settled down in your lives a bit. So, lets get back into painting! We were just about to begin our final project. This is the final assignment of the semester.

In this project you will be looking at the work of established artists (past or present), dissect the materials and techniques that they employ in the creation of their paintings, and emulate these techniques in the creation of your own work. Previously, when you were working on the forgery project you did the same thing with one artist, now you’re going to do it with more than one.

I want you to look at 3 key components. (Answer these questions)

How are the marks made?

What’s happening with the color?

How’s the composition constructed?

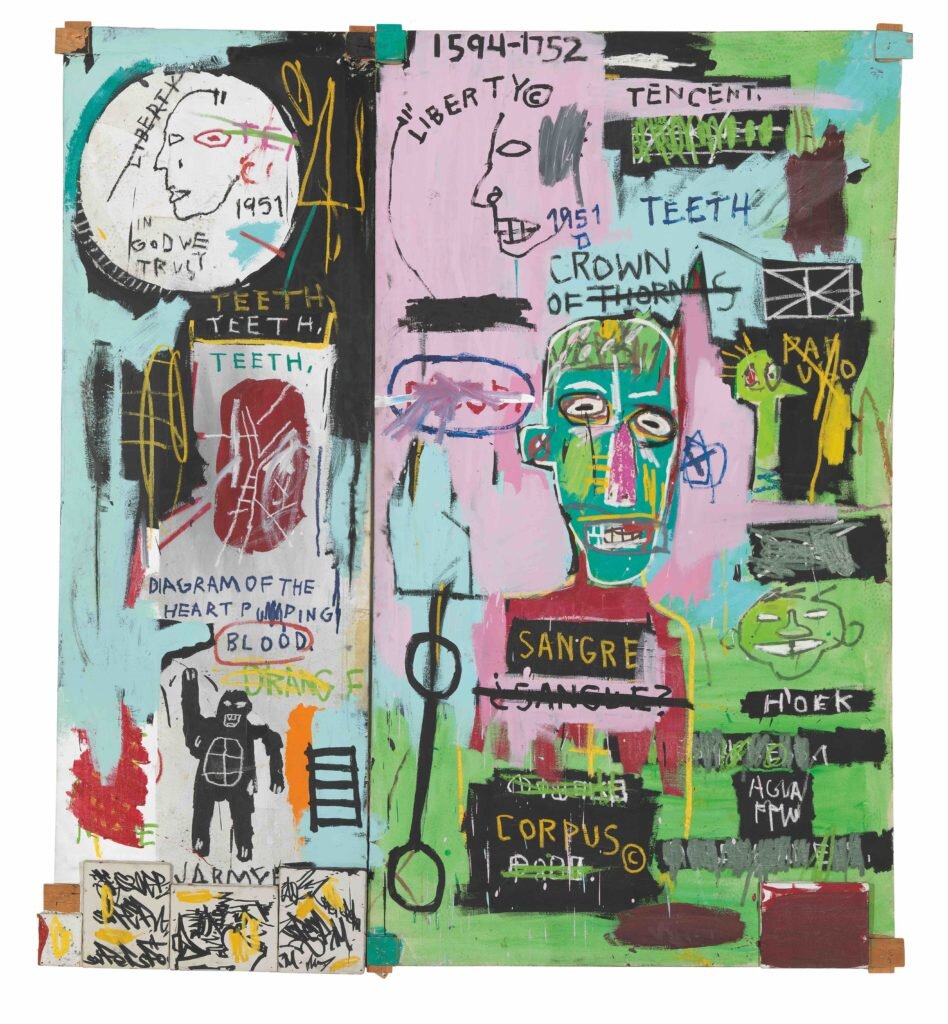
For example. Lets say the two artists you choose are Basquiat and Carvaggio.

Basquiat makes his marks quickly and sporadically. The colors are bold and bright, and there are multiple figures and objects dispersed throughout the composition. The portrait is cropped harshly out of the picture, and the general feeling conveyed by the painting is one of uneasiness.

Now let’s look at how Carvaggio paints.

First thing, this is a really large image so fee free to zoom in to get a better look. Here' the marks are made very deliberately with soft brushes. Glazing is employed which allows for subtle color changes. The colors are both very very bright, as if illuminated by something, and the backgrounds are very dark, almost like it’s a theater set. The figures are perfectly set within the composition. The width of the painting is in alignment with the length of Paul at the bottom.

So, now you’ve analyzed two different paintings, you’re going to be mixing up these two different techniques into the creation of a new work. So, for instance you could take the glazing and the dark background of Carvaggio, and then contrast this with Basquiat’s heavy handed marks.

Now, let’s say that you are really set on exploring a specific style, and you’re not interested in mashing up two very disparate styles. That’s no problem. For instance, if you’re interested in Germany Romantic Landscape Paintng you could look at two similar painters such as Caspar David Friedrich and Carl Rottmann. Both of these painters lived during the same time, did landscape painting, and were trained similarly in a very traditional academic style.

Carl Rottmann

Carl Rottmann

Caspar David Friedrich

Caspar David Friedrich

While answering the same three questions you’ll get similar results when comparing these two painters. The paint is applied in a similar manner, and the color schemes are very close, and even the way the composition is constructed is the same.

Now your job is to make a painting mixing up these two artists and create your own work. I’m very open to your interpretation of this, but I’d suggest using similar subjects. For instance, if the artist and painting you’re look at is figurative, then make a figurative work. If they’re a landscape, then make a landscape. There are some exceptions of course, for instance, you could make a painting of a teddy bear that looks like a Carvaggio painting, or you could paint a urban landscape like a German Romantic Painter. The subject matter in your paintings is up to you, but pay attention how your artists placed forms into the composition and the colors that they used.

So, you may be thinking that you don’t know where to start. Or where to find a bunch of different artists. Just head over to the instagram account for this course and look through the stories there. I’ve tried to compile a lot of different styles and techniques there. You should be able to find something that catches your eye. You can also look at this List of Art Movements wikipedia page and poke around there.

I want you to email me your project proposals. They should contain the following.

2 images of 2 different artist’s paintings.

Answer the 3 questions. Mark making, Color, Composition

Propose your project. “I want to make a landscape painting like Friedrich and Rottman of rural Idaho”

Moving forward you will have multiple options for keeping in contact with me. You can correspond with me via email, or you can meet with me on Zoom. If you wish to meet on Zoom just let me know in the email you send me and we can arrange a time. I just feel that if we have everyone from the class in a Zoom meeting about painting then it will be difficult to keep everyone’s interests for the full class. I think in this respect one on one meetings would be more beneficial.

You have the remainder of the semester to finish this project. However the rules on documentation remain. I want to see some steady progress, and not just the finished project! So take a photo every week of how things are going, and keep me up to date on your progress.

The final submission for this course will be a PDF of all the paintings you’ve made from the semester, and the final project. The more documentation you have the better!

I look forward to seeing your progress. Wish we were all still in class, but we’ve got to deal with what we have!

The Original Free painting course


This is an optional fist assignment just because I don't want someone's access to the Internet to effect their ability to use this book . Those who can't make a blog will instead keep a sketchbook that also includes writing, and inspiration.


Now for those of you who have regular access to the Internet, and own a digital camera or scanner, you will be creating a blog. Relax, it's not as hard as you think. I'm a big proponent of blogging your work because I think it is an excellent way of making a time line of your inspirations as well as your progress. Many of you may be terrified by the idea of creating and maintaining a blog because you don't think of yourself as tech savvy. Trust me, if you can check email, you can create and maintain a blog. Instead of hitting “send” you will be hitting “publish”. I've also included a step by step at the end of this chapter for those who are completely new to the Internet as well.

In this lesson I want you to start researching and becoming familiar with what drawings and paintings you really love. If you don't know where to start just go to wikipedia.com and type in “20th century art” (or whatever century you're interested in) . If you already know about a movement of art (say impressionism, or surrealism) that you are interested in then search for pages about that. If you are lucky enough to live in a city with a big beautiful museum then by all means go! Most public libraries also have a gorgeous selection of art books. I've also included a list of interesting artists from all over the artistic spectrum available at painting-course.com/artists . So you have no excuse. Start finding out what art you are drawn to the most.

<!--more-->

Now that I've given you the “what” to do, I'm going to tell you the “why”. One terrible idea which has seeped into many people's minds over the years is that it is bad to try and emulate someone elses art. Every semester I have another student who loves a certain type of art or artist but thinks it would be bad to try and emulate that persons style. As if they should just find their own style on their own. Let me tell you something. Just about every single great artist over the centuries looked up to someone else. Historically speaking previously students would apprentice with a master painter, they would try their best to learn all of their teachers techniques and they did countless hours of repetitive drawings and paintings. I'm not saying that your end goal should be to paint just as your idol, i'm saying that if you first emulate the paintings which you love the most, then you will naturally create your own style and vision as you become more confident.

Think of it this way. Im sure Wayne Gretzky and Michael Jordan had their respective idols they watched growing up. In classical music we don't say someone isn't a musician because they are playing someone elses music. In fact concert pianists are playing note for note what's right in front of them. It's their interpretation and technical abilities which makes them unique. You need to start thinking about painting and drawing in the same way.

In previous years one would have a sketchbook of thoughts, images, and sketches of inspiration. Today with the advent of blogs, it is much easier to categorize your interests and inspirations. Remember, this isn't a course about just “learning how to cross hatch” , this is a course designed with the intention of getting you to create work that you are proud of. Work that says something about you and your interests. So the first step in that is to get interested in some of the art around you now! Also don't be afraid to really hate something. You can appreciate art, but that doesn't mean you have to like it.

  1. Ok, you've convinced me. So how do I make a blog?

The first thing you've got to decide is what you want your blog to be called. This can be more difficult than you think.

If you want your name to come up in google searches I suggest just using your first and last name as your domain name, such as www.jeremiahpalecek.blogspot.com (that was my first blog). If you have a common name and the address is not available then try using a hyphen, or dot between your first and last name. If you have a ridiculously common name you can also try something like XxJohnSmithxX or JohnSmith64.

If you want to create a more visionary name for your blog the first thing you will be doing is creating a mind map. A mind map is a diagram used to represent words, ideas, tasks, or other items linked to and arranged around a central key word or idea. As you can see in the illustration below I've started with the central key word “painting blog” and from that I've brainstormed a bunch of words and ideas associated with painting. There's “descriptions of paint” (flake, chip, burnt, canvas, drip, slop, wet, gooey) “Materials” (ink, acrylic, oil, brush, pencil, gesso) “Famous Artists” (Michelangelo, Leonardo, Donatello, Raphael, Van Gogh ) “Art I like” (Dutch Landscapes, Surrealism, Dada, Impressionism) and the final category “cool names” (spark, antiquity, ancient, glisten, robot, dust, space) I did this mindmap in 5 minutes and now I can just start combining the keywords I generated to come up with cool website names such as PencilSpark, DadaDust, RobotSlop, AncientFlake, or GooeyVanGogh. It's that easy. Once you've got a name that hits you and you think “yeah, that's sounds cool” go with it. You've just created a new online identity. You can post anonymously there if you are shy about your work, but trust me, as your blog begins to fill with content you will want to be more closely associated with it. It will be a sneak peak into your artistic inspirations and personal progress. After you've got a few finished pieces up you can print out your blog name on business cards and give it to friends. They'll check back to see your progess. Trust me.


Now that you've got a Domain Name* you've got to choose where you want your blog to be hosted. The best way to describe what “hosting” means is to compare it to parasites. Sorry. When a parasite infects an animal, the carrier is called the host. The host is the person carrying the parasite, on the internet, the host is the computer which hosts your data. Sometimes people forget that the internet isn't some sort of ethereal netherworld. Every piece of data you look at when you are looking at a webpage is physically located on a computer somewhere. This generally costs money. However there are a lot of internet companies which will give you all the space that you will ever need for free. Amazing, isn't it. Google's Blogger.Com are the biggest however there are literally thousands of different websites giving away free blogs. I suggest looking at wordpress.com , blogger.com, tumblr.com , typepad.com , and livejournal.com.

The drawback of using a free site is that your Domain Name will include their's as well. So that's why you see addresses with .blogspot.com or .wordpress.com . It's because those companies are giving away storage space for free. If you're a little more tech saavy I suggest you look around at various blogging sites and choose which one you like the most. There are benefits and drawbacks of each. For this course I will be using wordpress as the default since it is the most widespread, sophisticated, and free blogging application available. It was also created by a large community of nerds for no profit. Which is pretty cool so they're always the good guys to support.

*Domain Name refers to the name of the address you type into a web browser (such as Internet Explorer or Mozilla Firefox). For instance Google's Domain Name is Google.com , My personal Blog Domain Name is Jersus.com

For those completely new to the internet I've created the following tutorial.

Once you get to any of these sites there will be extremely simple instructions to get you going. At Blogger.Com there is a big orange button that says “Create a Blog” , On wordpress.com there is a similar orange button which says “sign up now”. They are all pretty similar and most all of the blogging sites you go to will be screaming for your attention with a giant “CLICK ME!” button.

I am a big fan of wordpress personally so I'll take you through the following step by step on how to get a blog up and running on wordpress within minutes.

First go to wordpress.com . You there? ok. Cool. See that big orange button that says “sign up now”. Click that.


Now you get to this page. Fill in your information . Check that you've read the terms and conditions. Make sure “gimme a blog! (like username.wordpress.com)” is selected. And know that your username can be different than the website name. So you can just use your first name, or admin as your Username. Click Next.


Here you type in what name you will want for your web address. As you can see it put my Username in there as the default Blog Domain name. But you can change this and write in the name which you brainstormed using the mindmaps. You can also change the Blog Title to anything you want. If you want people to find your blog when they google your real name then put your real name in the Blog Title, for instance my Blog Title at Nerdkore.Com is “Original Oil Paintings by Jeremiah Palecek.”. If you wish you can put something more creative such as. RobotSlop's Painting Paradise. Whatever you want. Just have the Blog Title say something about you! Then choose the language you will be blogging in. Choose whether or not you want your blog to appear in search engines (google, yahoo, msn, etc.). Then click Signup. and BOOM! It's yours!


Click on login, and it will take you to https://robotslop.wordpress.com/wp-login.php . This is the address you will use every time you want to login to your “control panel” (which you will see in a moment) .


Type in your Username and your Password, Click Log In, and the Control Panel page will open up.


This is where you can control all of the information which will be posted to your blog. It may look complicated but you'll only need to know a few places I'll highlight which will get you up and blogging in seconds. Do you see where it says “New Post” on the top left corner. Click it.


That takes you to the page where you will compose your “post”. Think of a post as an entry in a journal. Type in a name for your first post.


Then I want you to go where it says “upload/insert” (detail below)


And click on the rectangular icon. (You'll notice if you hover your cursor over it, it will say “upload image”.) This window will pop up.

Click on Select Files. And you'll get a window popping up. Navigate to the folder which holds your images. This is the same as attaching an image or file to an email. Pick the file you wish to upload. And click “Open”.


The file will upload to wordpress' server and you'll see this window.


You can customize the alignment, and sizing if you wish. Now click “Insert Into Post” (bottom left). As you can see the image has been uploaded underneath your Title. You can click inside the rectangle and type some text under the image now. Then hit “Publish” which is located in the right sidebar.


And that's it. You've just published your first post with an image to the internet for all to see. Click on “View post” and you can see how the page is presented online. If you wish to change the look of your page you can click on “Appearance” (left sidebar) and further customize the look.

There you go. You're a blogger now. So start archiving images of what inspires you, and let's get down to the real business of learning how to draw, and then of course learning how to paint! This website is going to serve as your diary of progress.

For a list of previous students' blogs please go to painting-course.com/blogs . To have your blog added to the list please email me and I'll be happy to add it.


Introduction: Learning to See and Draw

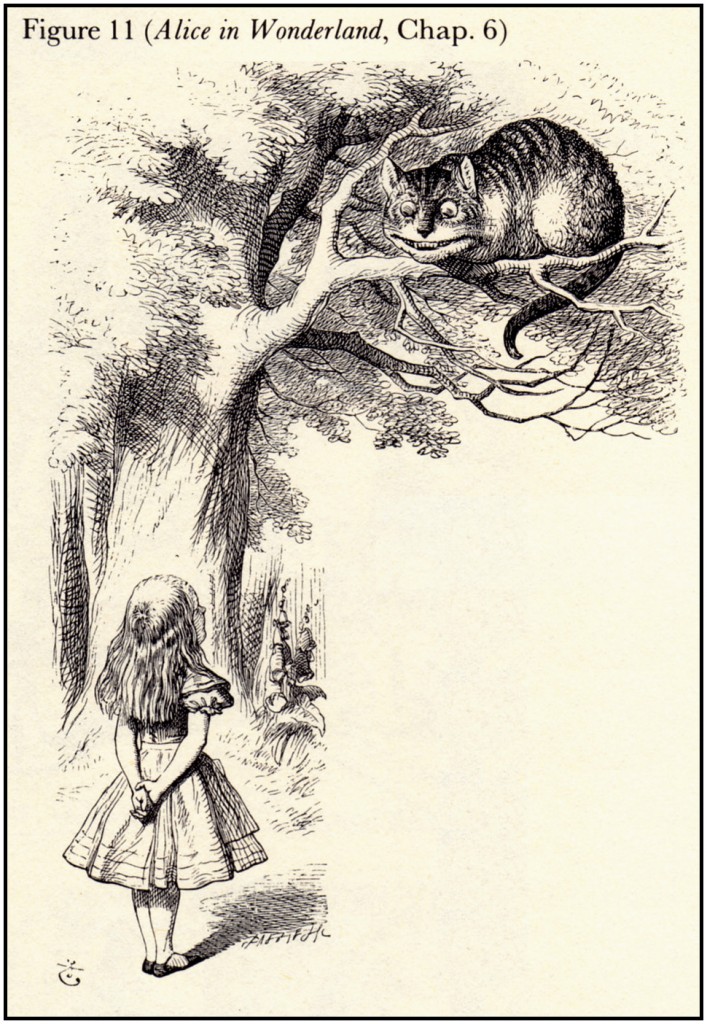
Welcome to Wonderland

alice-in--707x1024.jpg

“`Curiouser and curiouser!' cried Alice (she was so much surprised, that for the moment she quite forgot how to speak good English); `now I'm opening out like the largest telescope that ever was! Good-bye, feet!' (for when she looked down at her feet, they seemed to be almost out of sight, they were getting so far off). “

Lewis Carrol, Alice in Wonderland

Introduction:

Learning to draw is a bizarre and wonderful process in the sense that in order to really learn to draw you have to first learn how to see differently. It means changing the way you look at the world. All the time. In this course you will not only be sharpening your drawing skills on paper, but you will also be practicing your seeing skills. You are on the pathway to becoming a painter, and the first step on that path is to become confident at drawing. Through these lessons you will learn to draw step by step by starting with the basics and moving towards more complicated techniques.

This course is meant to be used and that means you need to draw and paint in order to make it work. The lessons are planned to build upon one another. You are going to go from basic contour line drawings to finished oil paintings. Everyone comes into the course at different levels. Get comfortable with where you are, know your limitations, and start working at getting better. Drawing is akin to yoga in this sense. If you push yourself too hard and too fast, you are doing it wrong.

<!--more-->

How your brain draws

Certain activities cause changes in the way our brains work. There is an instrument called an EEG which measures different brain waves. In the photo below you can see a participant in a study which measures brainwave activity.


(attribution http://en.wikipedia.org/wiki/User:Thuglas )

Our brains produce four major brainwaves. Beta waves are present when we are in a normal awake and conscious state. Theta waves appear when we are in deep relaxation or problem solving. Delta waves are present when we are basically asleep but not yet dreaming, and Alpha Waves are present when we are in a relaxed state yet still retain our sharpness and creative vision. Alpha Waves are where its at. You will not only improve your hand to eye coordination, but you will also learn how to get your brain to reach the Alpha wave state. Your brain learns these things step by step, much the same as one learns drawing or music.

A great example of an activity which requires a mastery of Alpha wave functioning is archery. When an archer pulls back his bow, closes one eye, and focuses on his target he may stop hearing the sounds and words around him. His fingers hold the string firmly. His breathing becomes more controlled and even. He calms his mind and this makes his aiming arm steady. He begins to visualize the arrow sailing straight into the big red spot. The bullseye wavers less and less as his finger tips begin to release the string. The string recoils and snaps forward. Splat. The arrow sticks into the target, and the archer begins to inspect his work.

This story encompasses all three of the major brain states. As the archer walks up to the line with his bow in his hand he is in Beta state. He is alert, conscious, and aware of his surroundings. As he pulls the string to his cheek he begins to slip into Alpha waves. He begins to relax and block out the sounds around him, yet he is still alert. Here's the crazy part, the moment before he releases that string his brain waves dip dramatically, almost all the way down into a near sleeping state! It's only for a split second, and then the arrow goes flying, and sticks into the target. He inspects the target to see if he hit the bullseye (Theta waves) then he snaps back to reality, and back to a Beta wave state.

When we draw we are going to be entering the Alpha and Theta lands. It's a place that anyone who has a skill of any sort knows well. The basketball player throwing a three pointer with 2 seconds left, the concert pianist, the marksman, even the gardener or mechanic. All of these people have worked on a project so hard that they've completely lost track of time. I'm sure you have as well.

Think about a time recently when you've slipped into Alpha and Theta brain waves. Perhaps it was while fixing your vacuum cleaner, avoiding a deer in the road, or arranging a flower bouquet. Become familiar with what it feels like when you are in this state.

Learning To Play The Tuba

Everything you see through your eyes, all of the feelings, joy, sadness, whatever, your whole world comes from your consciousness. When drawing, you are simply trying to make this consciousness readable. It doesn't need to be anything deep. It could involve something as simple as the way a guitar leans up against a windowsill. You are transmitting YOUR view of the world to others. Sure there are technical aspects, and training that will be involved in order for you to be able to measure accurately the distance between shapes. These fundamental aspects of drawing are teachable, and with practice, you will learn them. The question then, is going to be, Who Are You? Why do you want to make a mark on the world? What do you choose to draw?

This is the big thing that separates this book from others. I am aware that you want to “learn how to oil paint” and “learn how to crosshatch”. All I need to do is look at what people type into Google before finding my site. But these are just skills, they don't really get to what making art really means. Of course we will go over all the skills you will need in order to become a sucessful artist. I will teach you some tricks, and new materials. But at the end of the day you also need to know WHAT it is you want to paint or draw. Through the following exercises in this book you are going to be exploring both your artistic vision as well as practicing exercises which will sharpen your eye and steady your arm.

Many people who are interested in art feel intimidated because the lines have been blurred as to what is good art and what is crap. During the 20th century what it meant to be a “painter” or “artist” changed drastically. Previously draftsmanship and craft were highly valued. However this is no longer the case. Many times concept has taken precedence over craft. This basically means that today we give as much importance to ideas as we do to aesthetic appeal. You, on the other hand, have already decided to pursue the path of becoming an artist working in a very traditional medium. Paint. The goal of this introductory course is not only to make you technically proficient (that just takes practice), but also to help you find what you want to communicate through imagery. That being said, there is nothing worse than knowing what you want to do, but not possessing the technical abilities to bring the idea to fruition. If you know exactly HOW you want to draw and paint, and WHAT you want to draw, then consider the following analogy.

Think of an instrument you have no idea how to play, for instance, a guitar. Now it is generally accepted that if you want to become great at playing the guitar, you have to practice hard. No one expects someone to sit down and start playing the guitar immediately. A person generally needs a teacher, or at least a book and a whole lot of passion. But what it comes down to is that people are playing (practicing) daily. When they're not playing they may be listening to music and tapping out scales with their fingers.

In most drawing and painting or “art” (as it is so often referred to in the school systems) classes, many times teachers leave too much open to the students. They put too much emphasis on what the student is trying to express rather than addressing the fact that they may not even know how to get paint to stick to a canvas. The results are terrible paintings and drawings. No amount of pretense can make up for a poorly executed painting.

Let's return back to our guitar player analogy. Imagine you are listening to someone playing the guitar and singing. The voice is off key, the strumming is out of sync with the tempo, the chords are clumsily played, but the lyrics are fantastic. Are you going to say “He's a great musician!” just because the lyrics were great? Of course not. With music we put a great deal of importance on craft. A good guitar player's fingers had to get calloused in order to push down the guitar strings. At first the stings clunk out, but then, with a little practice, it begins to get easier and easier. The same is true of drawing. It's just practice. If someone tells me that they are a terrible drawer, I tell them that I can't play the tuba, but I bet I could learn.

For some of you reading this book. You may already be comfortable with drawing, but find yourself coming up against certain stumbling blocks over and over again. You are going to learn to identify the problem areas of your drawings and become your own teacher. Even concert pianists practice scales. Drawing and Painting are no different.


Lesson 3: Start Drawing


Start Drawing

Lesson 3

Finding Your Baseline

Before we push forward into the lessons, we need to make a record of exactly where you are at now. This is your baseline. It can be a very daunting task but you are just going to have to jump in and start drawing!

Open your sketchbook and on the first page write the date and sign your name under it. As you sign your name, imagine that you are signing a contract with yourself to give your passions the attention that they deserve. People can have very strong past associations with drawing, and many times students get discouraged because their drawing skills aren't up to snuff. But instead of buckling down and working hard they give up. This makes it hard for many to start drawing.For whatever reason you've made a pact with yourself to learn this new skill. There's the date, and your name. This marks the beginning of your commitment! enjoy! Now all you have to do is put that pen to paper and start drawing. Don't worry if it's terrible, just jump in, and start drawing today!

I understand why drawing can be really hard for some people. Gazing at the white page mustering up the courage to make that first mark. And then suddenly, there your drawing is. Staring right back at you. During this point of reflection it is important to identify if you have any evil inner critic present. An evil critic is a voice in your head that discourages you, and tells you how you don't know anything. It is great to look at your own drawing and see where you need to make improvements, but don't be too hard on yourself in the beginning.

For your first assignments you will be creating three drawings. You will also get a "sketchbook" assignment which I will explain later. The accompanying images come from students, as well as famous artists. The point being that I don't want anyone to just copy how I draw. So I've tried my best to vary the drawing styles as much as possible.

Assignment #1 : Your Baseline .

Time: 2 Hours

Drawing #1 "Small Object Still Life"

Materials needed: Sketchbook (Click here to buy a Moleskine, but any sketchbook will do). Pencil.

For this assignment you will find a small object, position a light source on it, and draw it. It could be a salt shaker, a little figurine, a toy car, etc. For the light source you can use a desk lamp or even some tall candles. Just make sure the light is coming strong from one direction. If light is streaming in through the window in your kitchen sit down there and draw! Give yourself 20 minutes for this drawing. Set a timer, or an alarm clock.


small-object-drawing-1024x792.jpg

Drawing #2 "An Interior Space"

Turn to a clean page in your sketchbook. You are going to be drawing an interior space. Let your lines touch the edges of your page. Do the drawing across two pages if you wish. The main concept here is to see how you deal with space. So you can draw shallow space (such as a table with an assortment of objects) or an entire room. You have 30 minutes. Go!

interior-drawing-med.jpg

Drawing #3 "A Self Portrait"

This can be the scariest of all the drawings so why not just get it out of the way now! You are going to set up a mirror (even a small pocket mirror set up a meter (3 feet) away is big enough to get your whole face) and then you are going to light yourself. In drawing it is very important to always understand where your light is coming from. The best way to light a model is to use something called "form lighting". Form lighting (illustrated below for all you visual learners) is when you have a direct light source coming at a fourty-five degree angle above the model.

form-lighting.jpg

This gives you a lot of nice cast shadows that fall on the form in a pleasant manner. There are many different ways to set up your lighting and once you get the hang of drawing you can delve more into using the lighting to create mood. But for now lets just stick to using form lighting.

George-Richmond-self-portrait-drawing.jpg

So once you've got the lighting set you are going to sit down and draw yourself. Try to have your head take up a good portion of the page. You have 30 minutes.


George Richmond (28 March 1809 – 19 March 1896) English


Sketchbook/Blog Assignment.

You are going to photograph or scan your drawings (instructions on how to photograph your work are below. ) and upload them to your blog. I also want you to make one blog post post about one artist who you admire. It can just be a few short sentences and an image of their work. Don't skip this though. Learning about loads of different artists will only help you find your own creative vision. If you cannot work out how to maintain a blog then print out an image and paste it into your sketchbook. Write a few lines about the artist. You can also go to http://antiquity.tv which serves as the art history department of painting-course.com . Here you will find constantly updated artist profiles from all throughout history.

How to photograph your finished work


Unfortunately photographing drawings isn't that easy. The best way to get a good copy of your drawings is to scan them. If you don't have a scanner available then there's always the possibility of photographing your work. Under optimum circumstances you will have two light sources. Both at pointing at the drawing from 45 degree angles. This minimizes shadow. However it can take a lot of trial and error before a good picture is made.

One of the big problems is that most digital cameras have an automatic setting. There are light sensors in the camera and they detect how long to expose the image. So, when you point a digital camera at a white page the camera thinks it's lighter in the room than it really is. This can make the drawings look really dark. One way to fix this is to hold the button on your camera half way down (this sets the light settings) while pointing it at a shadow, then (keeping the button held half way down) point the camera at your drawing and push it down the rest of the way. This makes the camera think it's taking a picture in the dark which will make your page look a lot whiter. There are also services through facebook and twitpic which allow you to sms your images to the internet from your phone. So, if you've got a camera in your phone. You can post those images to the web! Having digital images of your work will make it easier to show off your skills and is a good habit to learn early.


Lesson 4: Drawing Lines

Drawing Lines

Lesson 4

Line

Lines don't exist in reality. Everywhere you look you can see various forms bouncing into other forms, but no lines. This is the first thing to understand about a line. It is completely a creation of the human mind. We understand lines and pictures because we know how to read them. When a line is drawn on a piece of paper it's intention is to depict the three dimensional world on a two dimensional surface. You are the magician deciphering what you see in reality and transforming it onto a two dimensional surface.

In the following drawing assignments you are going to be exploring contour lines. That means no shading. You are going to be focusing only on the edges of forms and shadows. It is on these edges where your line will wander.

Assignment #2 Contour Line Drawings

Drawing #4 Blind Contour Drawing of your Hand

Sit at a table where your arm is lying comfortably on the surface. Turn to a clean page in your sketchbook. Now I want you to pose your hand. Try to be a bit creative and scrunch up your fingers and position them at interesting angles. Hold your hand in this position. With your other hand place your pencil on a clean page in your sketchbook. Now I want you to begin drawing it. But here's the catch. You are not going to be looking at your paper. You are going to keep your focus on your hand, and do the drawing looking only at your hand. That's the "blind" aspect to this drawing. I want you to imagine that your pencil is touching the outward contours of your palm, winding in and out of all those wrinkles, and sliding down those slopes. As your eye moves: Your pencil moves. Think of yourself as Luke Skywalker when he's on the Millennium Falcon for the first time. And he's got to use his light saber to fend off lazer shots with his blast shield down. Use the Force! The urge to glance down at your paper will be strong. But don't fall into the dark side. Just keep your focus on your hand. The good thing about this drawing is that you have absolutely no responsibility to try and make it look "right" at all. Just let the lines wander all over the page as your eye traces the outside contours of your hand. As you can see in the example below, if the drawings look "correct" then you're not doing it right. You have 20 minutes to make 5 blind contours of your hand. Go!


blind-contour-med.jpg

Drawing #5 - "50% Blind 50% Looking"

In this drawing I want you to continue to draw while looking at your hand. But you can cheat. With that being said don't allow yourself to fall completely back into how you would normally draw. Do an outside contour of a finger blind, then regain your positioning, and start again. So half of the time you should be looking at your page and the other half you should be drawing while looking at your hand (blind contour). You have to really slow down in order for this to work. One hand should take you at least 10 minutes. You have thirty minutes to make at least two hands.

contour-line-drawing-hand-med.jpg


contour-line-drawing-hand-2-798x1024.jpg

Drawing #6 "Finished Contour Line Drawing"

For this drawing you will be positioning your hand once again and drawing it however you wish. Try and remember everything you've learned from the last few drawings and now incorporate those ideas into making the best completed drawing of a hand you can do. Don't worry about shading. It's still about the contour lines. You can outline areas of shadow if you wish, but please refrain from shading them in. We'll get to that later. You have 20 minutes.

mucha-b-w.jpg

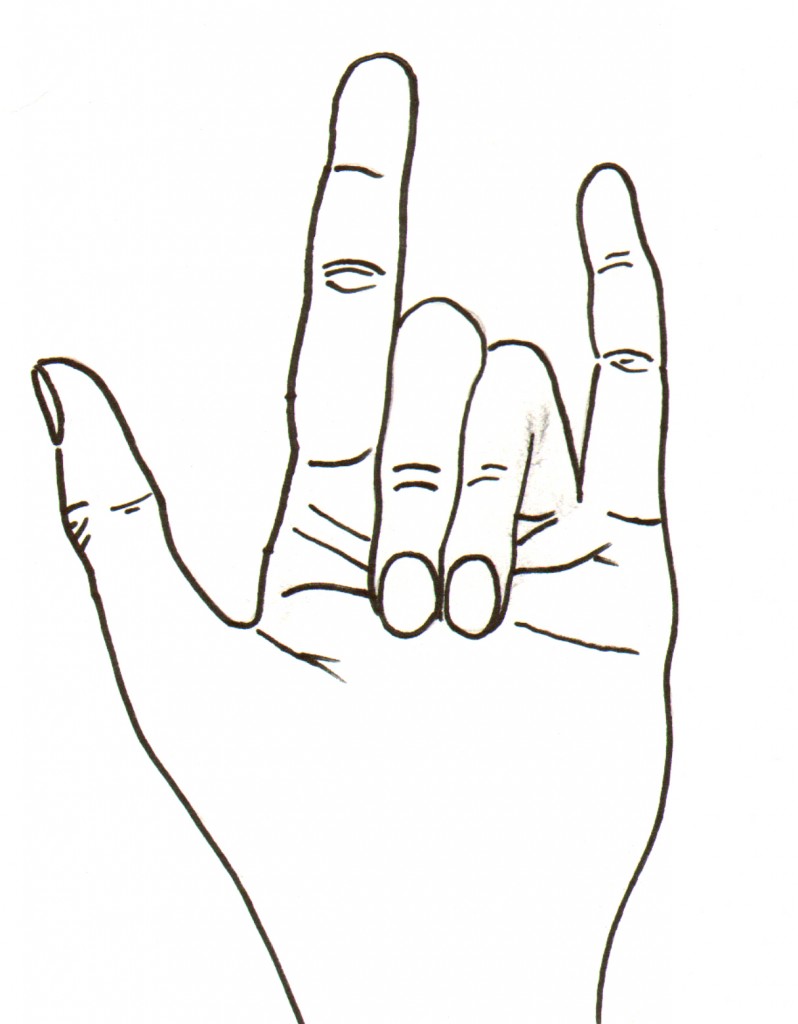
Rock on.

Drawing #7 "Mucha Copy"

For this drawing you will be copying a master artists work (Alphonse Mucha). I choose Mucha because it's hard to find anyone with a more elegant and crisp line. Get as much done as you can in an hour. Look at how Mucha varies the thickness of his lines in different areas. This Mucha drawing is extremely difficult, however one must remember that as a student you are training and practicing. You are not obligated to make gorgeous drawings yet. Do your best. You have 1 hour.


Lesson 5: Symbols of drawing.


Symbols of Drawing

Lesson 5

Negating and Identifying Powerful Symbols

Drawing #8 Find an image of anyone. Could be a famous person, could be a relative. Doesn't matter who. But try to find an image that is at least is decently lit. You are going to stare at this image for three minutes. Trying to take in every little detail you can. Then, after three minutes is up I want you to put the photo away and draw the person from memory. You have 20 minutes. You may begin.

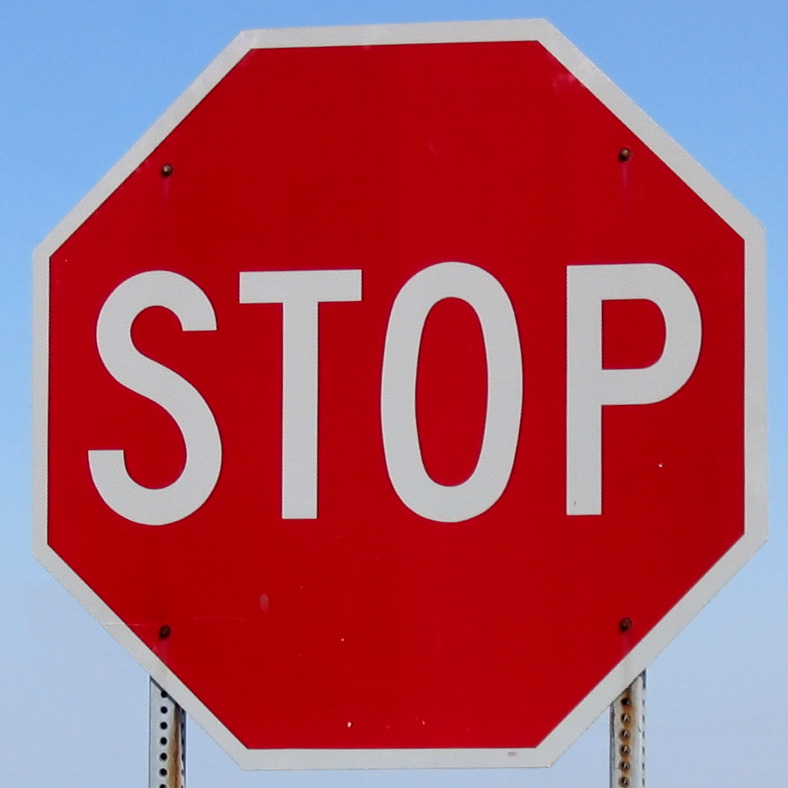
Stop_sign_us.jpg

STOP! You must complete drawing #8 before you go any further.


We are surrounded by symbols in this day and age. We may even react to them without knowing. A red octagonal sign means "Stop!" all over the world. Other basic symbols tell us where the elevator is or where to run in case of fire. The most common type of symbol we see in every day life is something called a pictogram. In the pictogram below it is very easy to understand that this is a washroom for both women, men, and handicapped accessible.

African_Elephant_Trunk.jpg

While these types of symbols can be great for communicating basic messages they cause big problems for drawings. Here's one of the most important things to remember in this entire course. If you want to learn how to draw you have to stop thinking about what it "is" that you are drawing, and instead think of what you are drawing as a giant puzzle of shapes, shadows, and lines. So, if you're drawing an elephant, don't think of the trunk as a trunk, but instead the elephant trunk is just an abstract mass of shadow and line. This is what it means to start "seeing" like an artist.

old-man.jpg

Let's look at an example of a student's work who also did the "Drawing from Memory" assignment. In the first image we see the original image the student was working from.

drawing-memory-med.jpg

In the memory drawing we get a good feeling for how the student makes certain features of the face. It is important to identify these symbols for "eyes" and "nose" so we can catch them when they sneak into places that we don't want. Everyone has a certain sets of symbols they use to construct drawings (especially portraits). Later on we can use these symbols to our benefit, so we don't want to throw out the baby with the bath water. But for now we need to identify what our habits are, and what symbols we use. This way we can stop using symbols for "eyes" and "noses" and start to really look at the shadow shapes present which give the illusion of an eye or a nose.

Drawing #9 "Drawing A Portrait from a Photo" (Sideways)

For this drawing you are going to be drawing from the image that you memorized for your first drawing. But as always, there's a twist. We really want to stop your brain from naming everything it's drawing so you will be drawing the portrait on it's side. No, you don't have to stand on your head, instead just turn the image on its side (see example below). For the shading you will be making simple left to right marks. Imagine that you are drawing the way a printer prints. Your pencil makes a simple left to write mark every time it sees an area of shadow. And yes, you may look at the source image.

sideways-head.jpg

You can touch up a few small lines indicating direction in the end but try to keep most of the lines moving in the same direction. You have up to an hour for this drawing so take your time. Once finished compare the drawings side by side and it will be obvious what symbols you generally use. Now that they've been identified they can be quarantined and perhaps we'll use them later, but generally, they are just left-overs from what someone told you when you were 14 years old. Forget about them and push forward, you still have to learn all about form, line, value, shape, space, texture, and color. Your old symbols probably won't be of much help. In fact they are generally the biggest stumbling block for older students to overcome. Learn to draw seeing shadow and light shapes.

old-man-drawing-med.jpg

Lesson 6: Observational Drawings

Observational Drawings

Lesson 6

Gesture Drawings and Observation

In the following drawings we are going to work at getting loosened up. One problem many students encounter is that the more they concentrate, the harder the hold the pencil, the stiffer their arm becomes, and the tighter the drawings look.

We are going to loosen up our drawings by loosening up our arms. Before you sit down do some simple arm stretches and take some deep breaths. Sit down at a comfortable table and begin by drawing these circle spirals across the page. I used to have to do these as a child in a penmanship class. But I still find that it is a great way to get loosened up for drawing. When doing this exercise it is important to make the circles by moving your entire arm. Don't get all tightened up and draw with your wrist. Your arm should bend at the shoulder when drawing. This is why it is very common in beginning drawing classes to work on very large pieces of paper. You have 5 minutes to fill up a page full of these spiral circles.

circle-spirals-penmanship-exercise-med.jpg

Now that you're loosened up it's time to jump into the gesture drawings. A gesture drawing is more about drawing what something feels like, rather than trying to depict exactly what you see in front of you. It's more about direction, weight, and speed, rather than measuring and perspective. You are capturing a fleeting glimpse of an object. Be careful not to think that just because you are drawing fast, that that means you are doing gesture drawings. This isn't the case. A good gesture drawing is fast, but it also captures the gesture of the object itself.

Drawing #10 "30 Gesture Drawings"

The first part of this drawing assignment requires you to collect thirty small objects from around your house. These can be absolutely anything. Small knick knacks, matchbooks, remote controls, pens, forks, shoes, hairspray, etc. Collect everything together and put it on a table. The second thing you need is a stack of cheap paper. This could be newsprint, copy paper, or some paper you pulled out of the recycling bin. Now, you are going to be drawing each item seperately. You will get one minute for each drawing so try to capture the essence of what that thing "is" in that minute. Think about the physicality of the object. How the edges swoop in fast before jutting back at our the rim. I always think about skiing when I'm doing these drawings. Imagine a little skier sliding down the contours of all these little objects. My pencil follows the movement of the little skier and slides in tandem with him. Swooooooop! Here comes the bunny hill! It's possible that your brain will start to strain at times, this is good! feel the burn. You have 30 minutes for 30 drawings. GO!

gestures.jpg


Made it through? Now may be a good time to take a little break and give your brain a chance to rest. Sometimes drawing will make you feel like you're cramming for a test. It's ok. You are simply using parts of your brain to complete a task it isn't used to yet. Nothing beats practice. You will be amazed at the improvements you can make by just devoting 30 minutes a day to drawing.

For the second part of this Assignment we are going to be doing our longest observational drawing that we've had so far.

Drawing #11 "Observational Still Life: Small Objects"

Time Required: 1 Hour

Arrange all of your small items on a table in front of you. Create a strong light source coming from one angle. This can be achieved with a small desk lamp or even by sitting near a window and turning off the lights. Just make sure that your objects have some sort of interesting lighting going on. In the two images below you can see what a big difference the way we light the scene can effect the mood of the drawing. But more importantly, we want our light to say as much as possible about the objects we are representing. I can't stress how important lighting is in terms of painting and drawing.

still-life-lighting-1-med.jpg

In this image the shadows tell us a lot of information about the underlying form.

In this image we have light coming from multiple angles. There are virtually no cast shadows, and while the colors are brighter (the result of blasting the objects with multiple lamps) we aren't given a lot of information about the forms themselves. If possible experiment with positioning the light in different directions and look at how the light changes the way we see the forms.

still-life-lighting-2med.jpg


Now that you've got your lighting set, and your objects arranged, you are going to do a drawing of your "still life". You have up to an hour to complete this. Squint your eyes! When you squint your eyes it is easier to find areas of shadow. It is ok to exaggerate how dark some of your shadows are. If you are familiar with photoshop you can make the comparison to taking up the contrast on an image. Which means making your darks darker, and your lights lighter. This drawing will be done in pencil.

rembrandt-drawing.jpg

Sketchbook: Drawing#12 "Rembrandt Copy"

For this sketchbook assignment you will be completing a copy of a self portrait by the famous 17th cenutry Dutch painter Rembrandt. The reason I chose this drawing is because it has a very loose gestural feel to it. You simply cannot do this drawing with a tight hand, so get your arm loosened up and jump in! You can do this drawing in pen and ink, or pencil.


Click on image for larger version